We are so excited to share the vintage farm birthday party that we threw last week for a very special little farmer! 

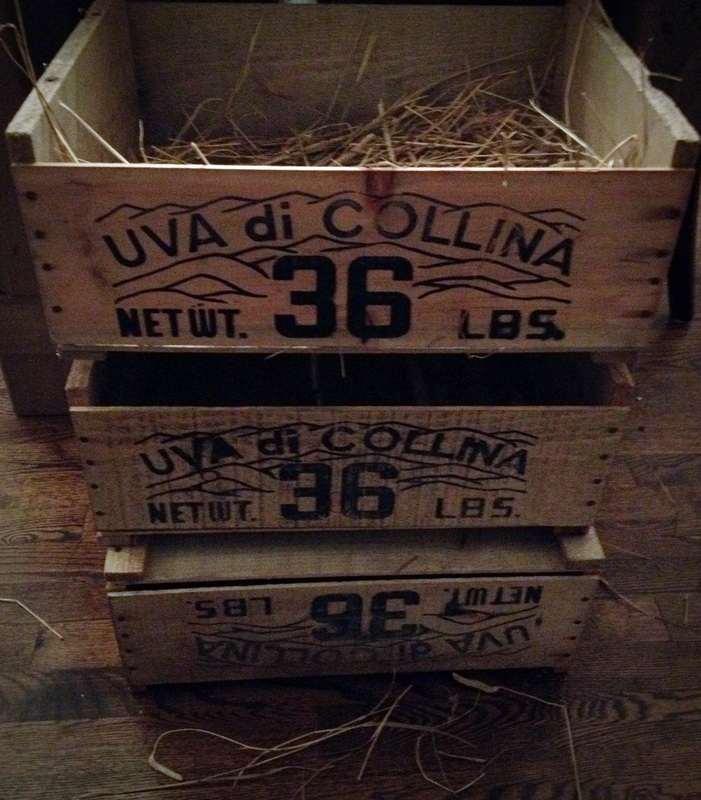
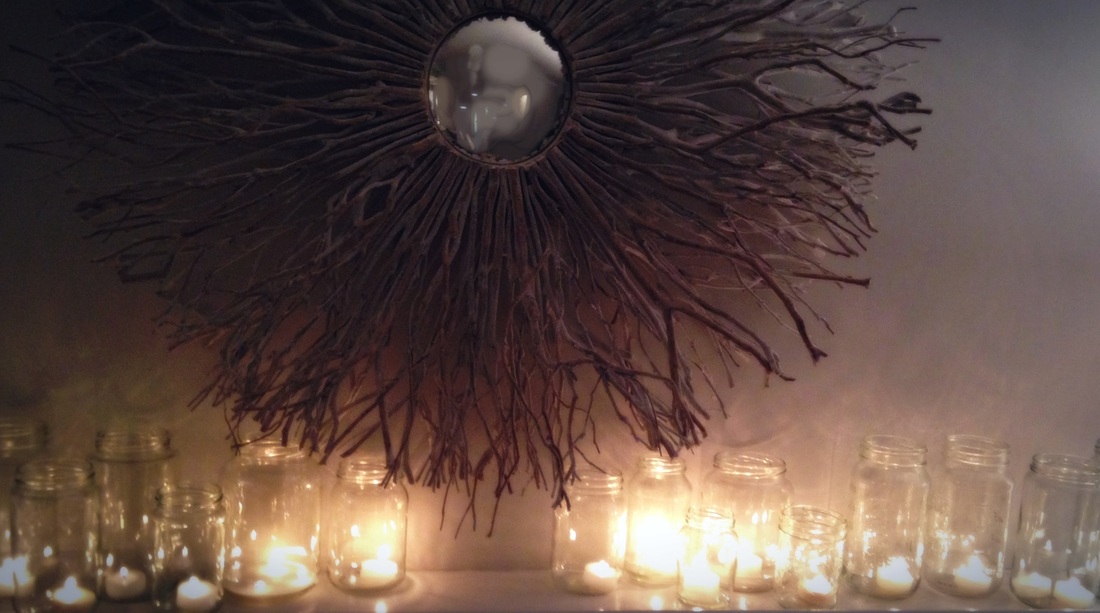
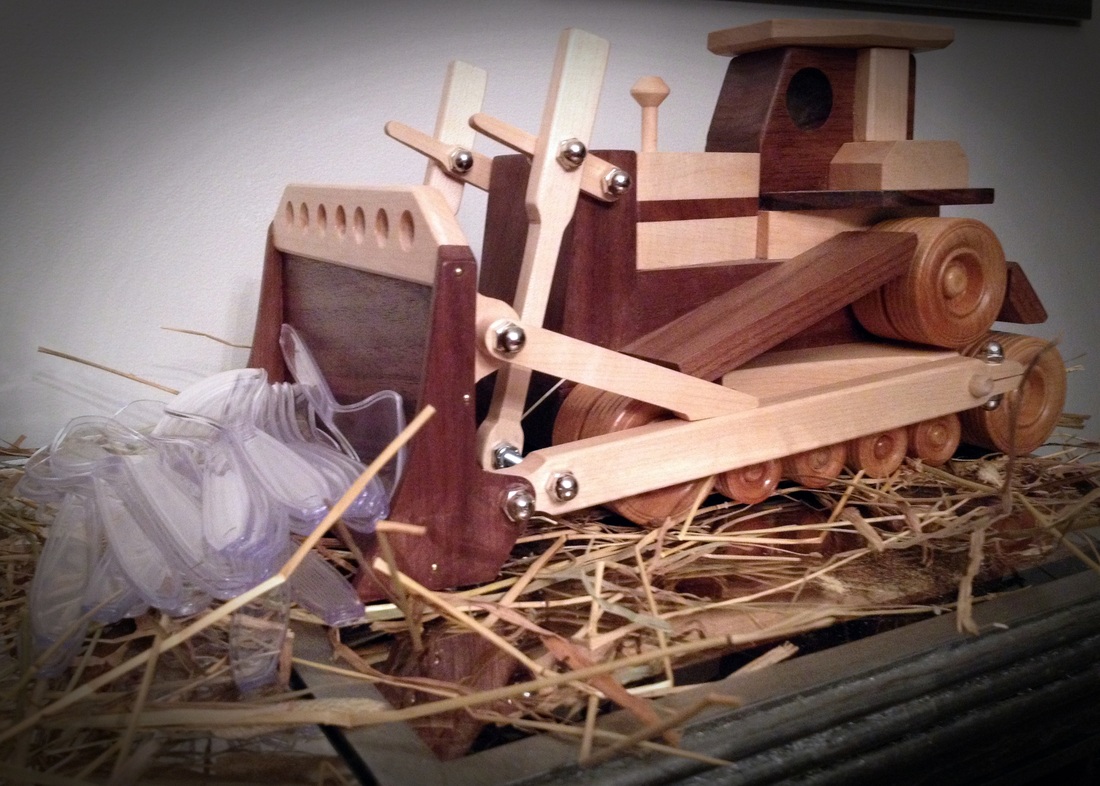
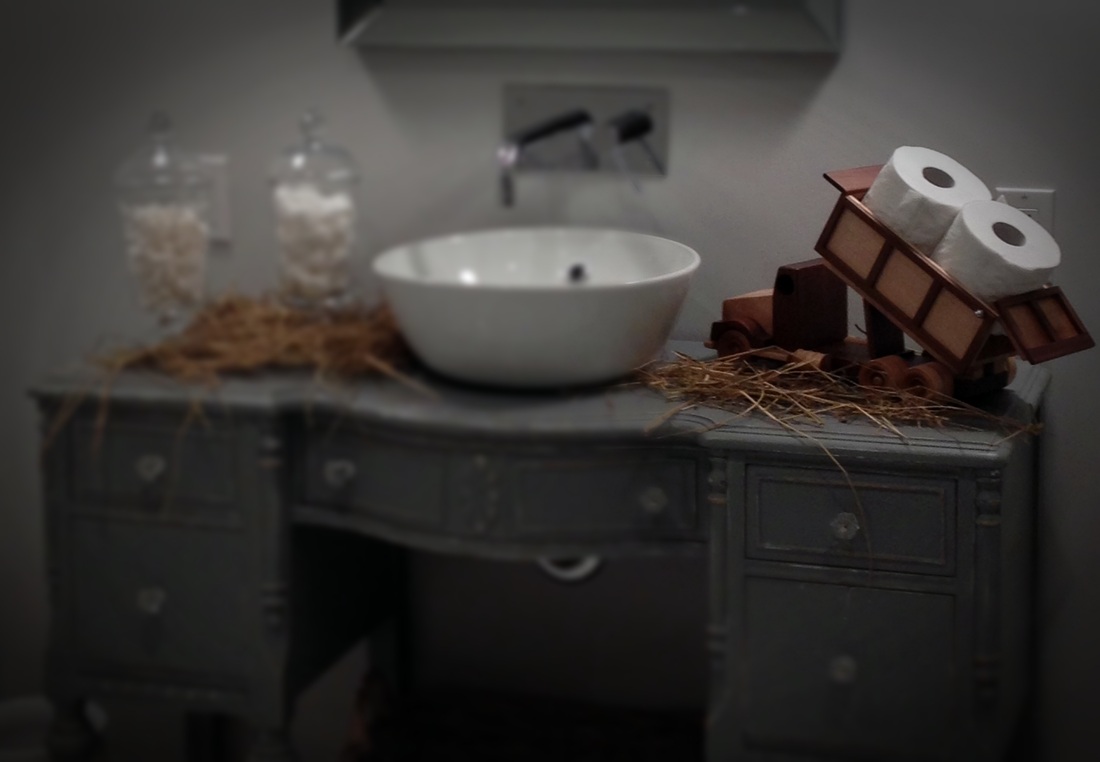
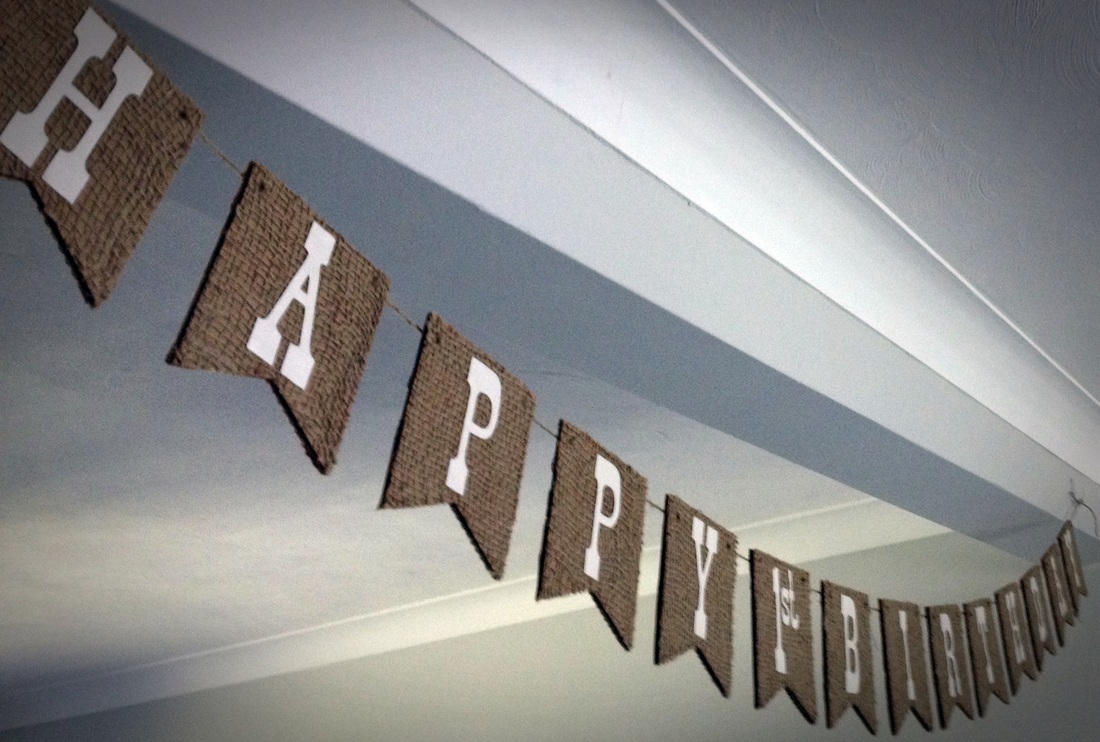
The decorations included plenty of vintagized grape crates, a party animal chandelier, mason jar candles, wooden farm equipment made by the birthday boy's grandfather, and the rustic birthday banner we featured a few weeks back.
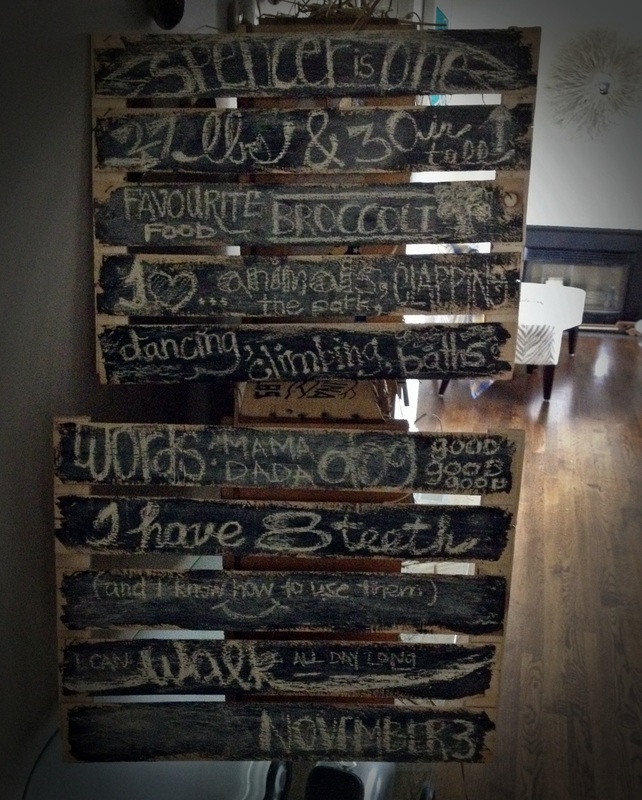
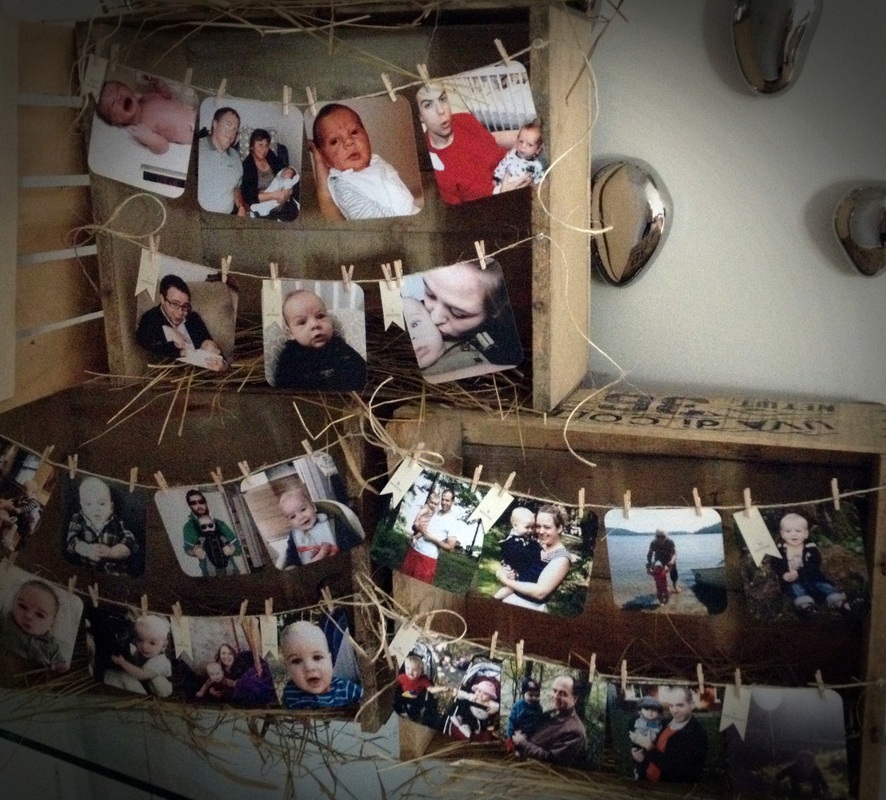
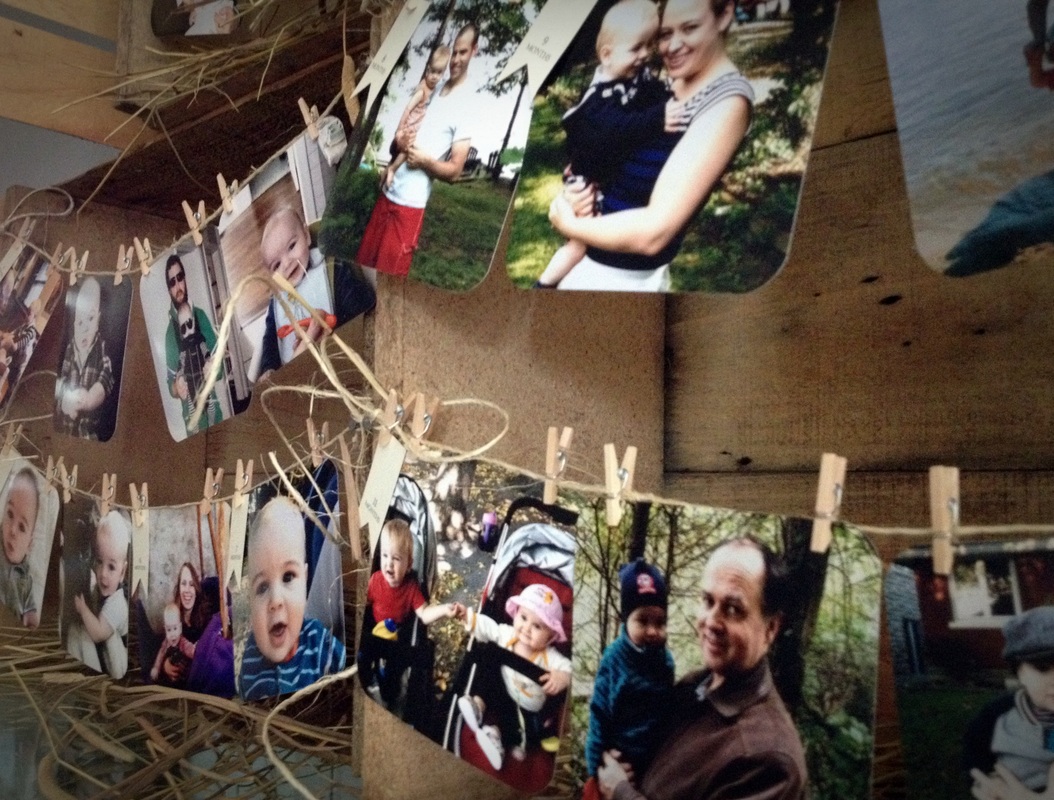
In order to celebrate the birthday boy, The Party Planning Committee created a chalkboard our of grape crate lidsand wrote down all of his 'stats', and strung up lots of pictures of his first year!
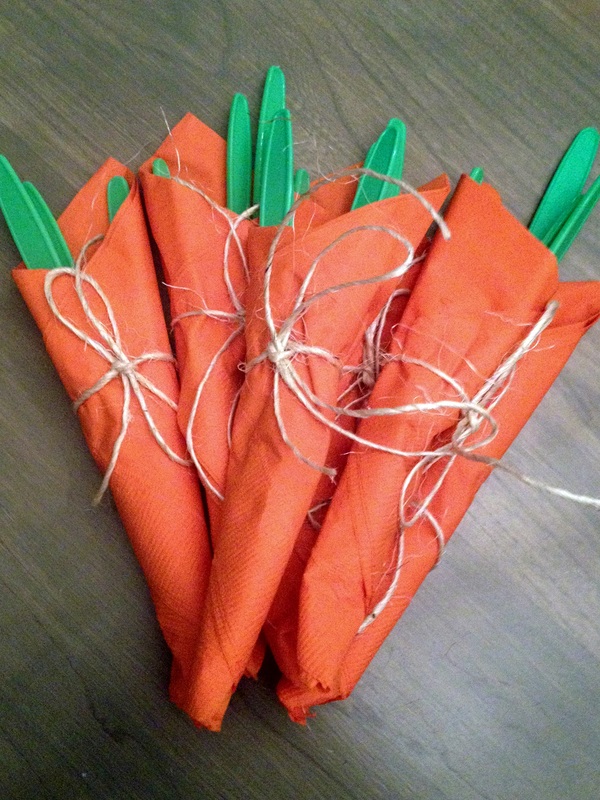
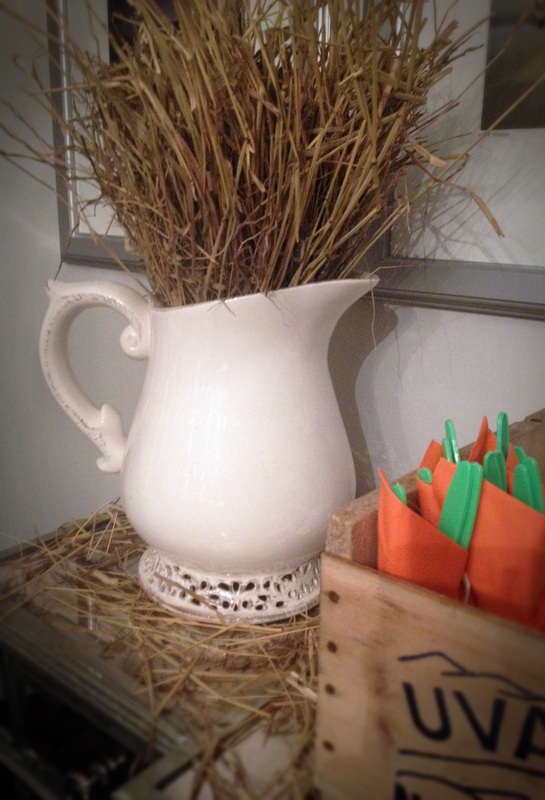
Green cutlery was wrapped in orange napkins and tied with twine to look like carrots.
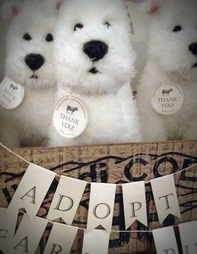
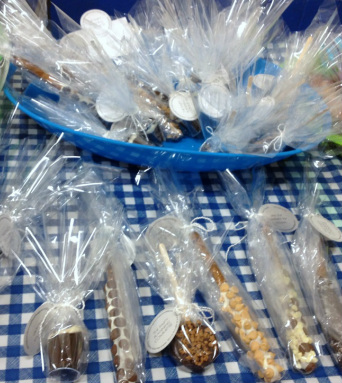
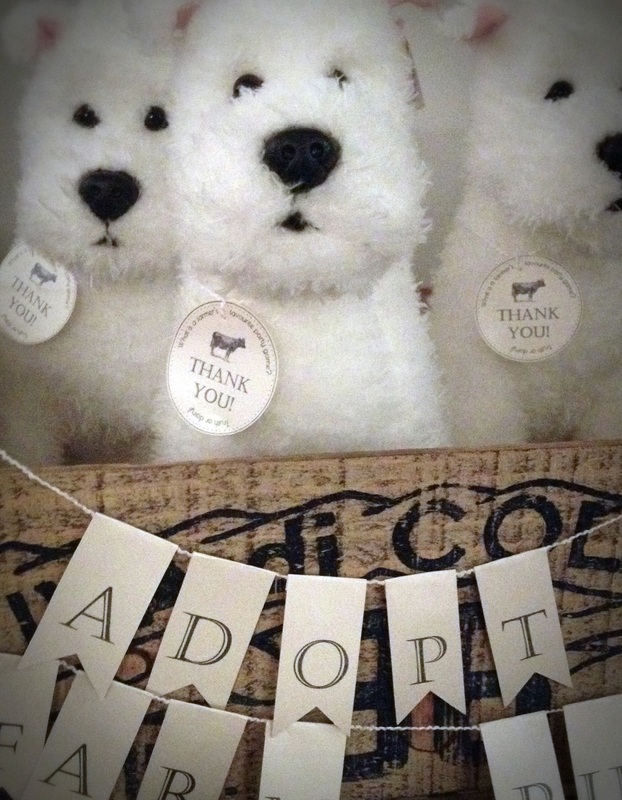
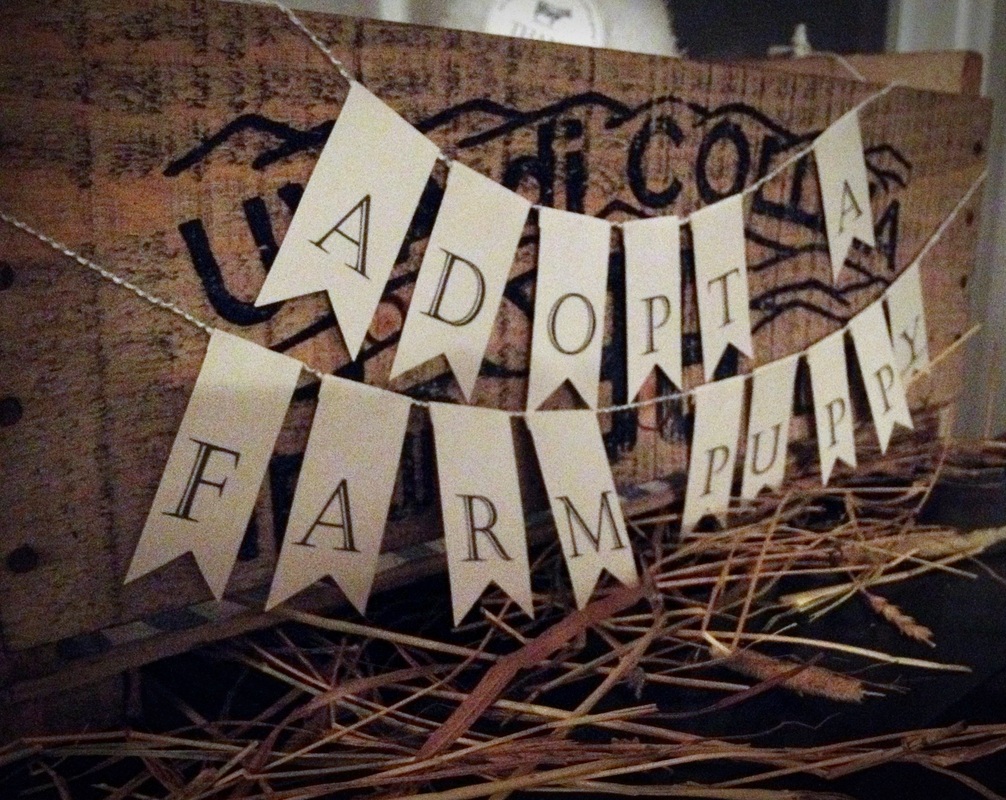
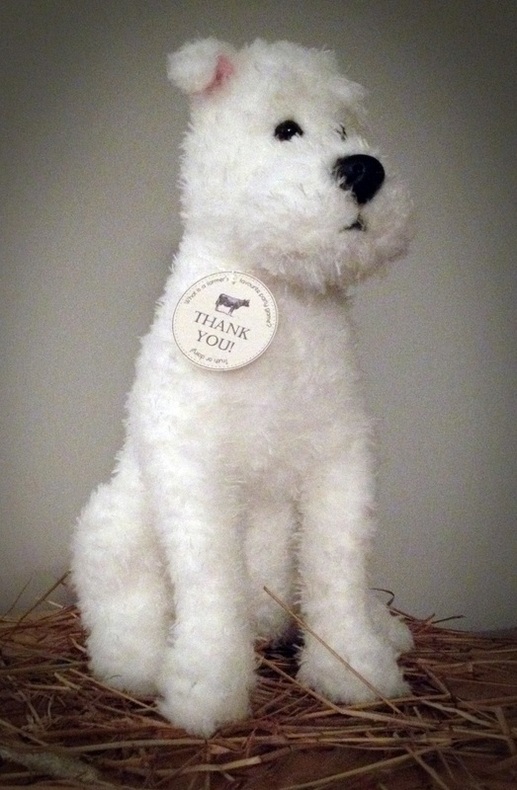
Mini guests adopted stuffed dog "farm puppies" as their favours. There is a free printable available on our blog here for the thank you tags. The same thank you tags were also used to label chocolate-dipped pretzel rods for the adults.
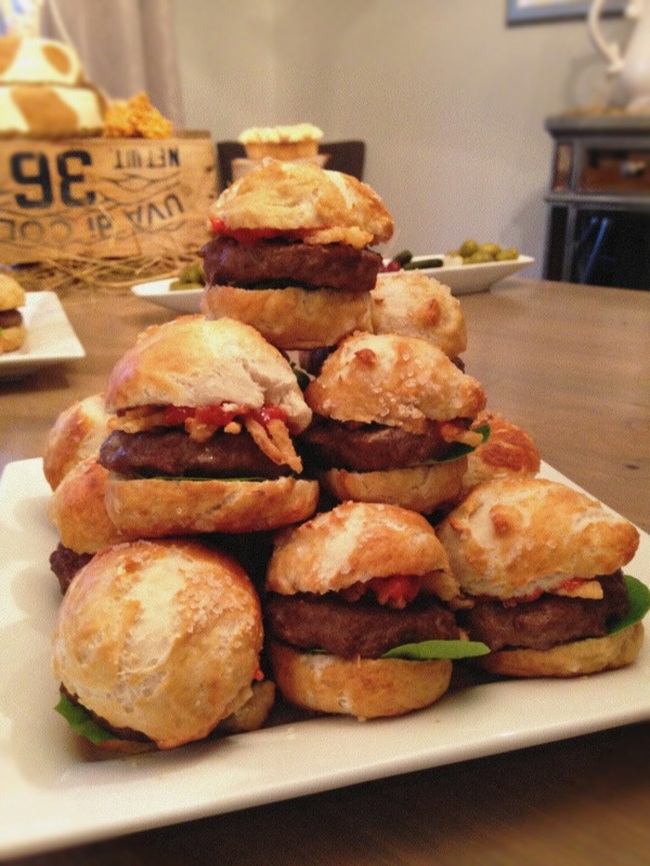
On the "mini" menu was:
  • Sliders on homemade pretzel buns (we shaped the patties using a cookie cutter and followed this recipe for the pretzel buns)
  • 2 kinds of mini pizzas (goat cheese with red onion, sundried tomato and kalamata olive, and meat lovers)
  • Bacon-wrapped dates
  • Mini "baked potatoes" (new potatoes baked in the oven, topped with sour cream and chives)
  • Fresh veggies in ranch sauce
  • An olive and pickle platter
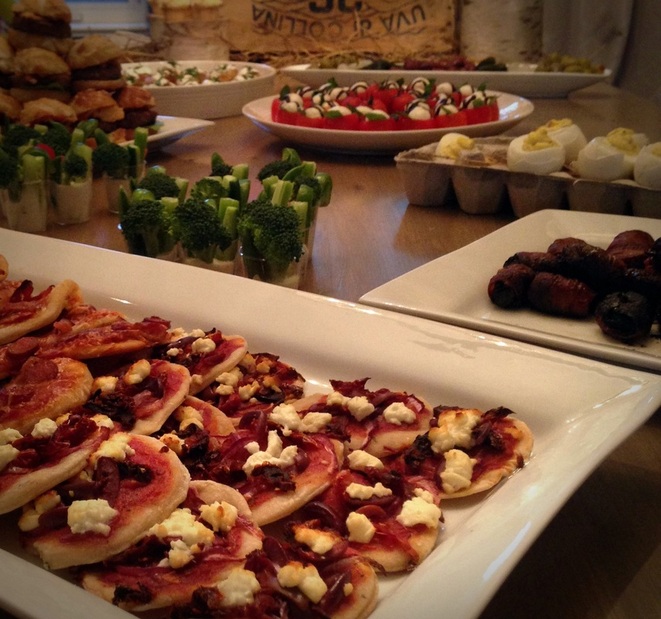
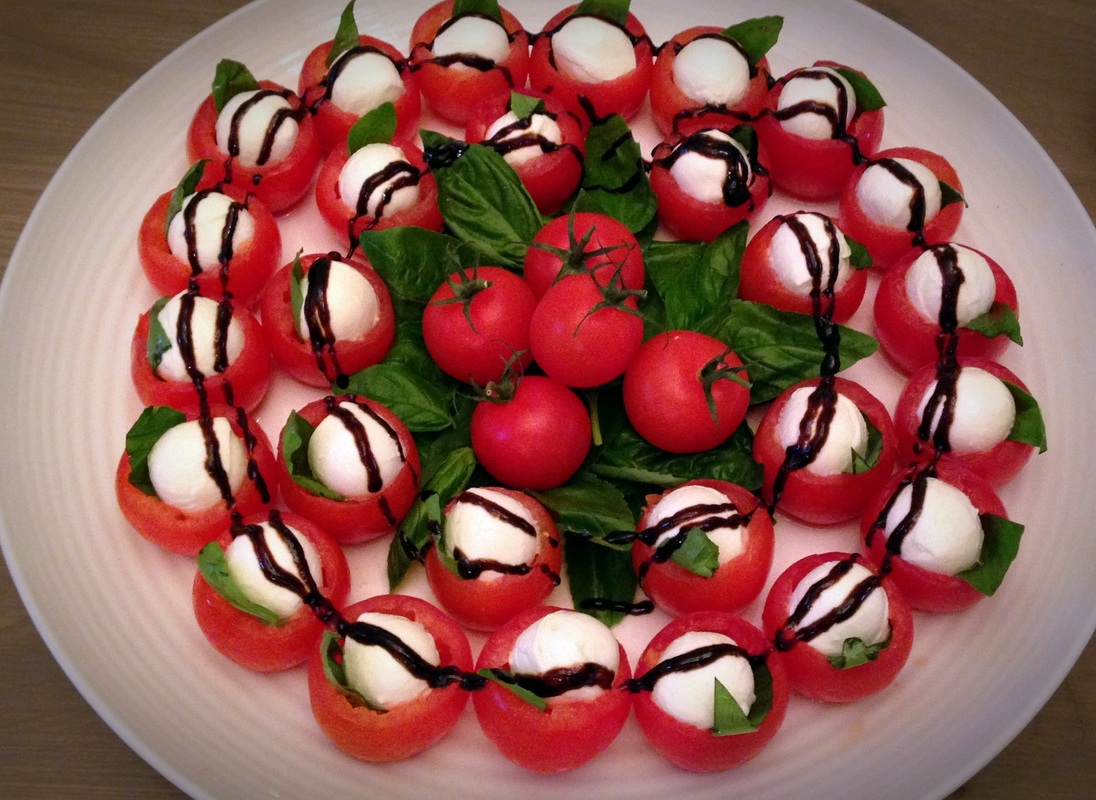
  • The caprese salad bites we featured here (we found larger cocktail tomatoes and cocktail bocconcini, making these even easier to make!)
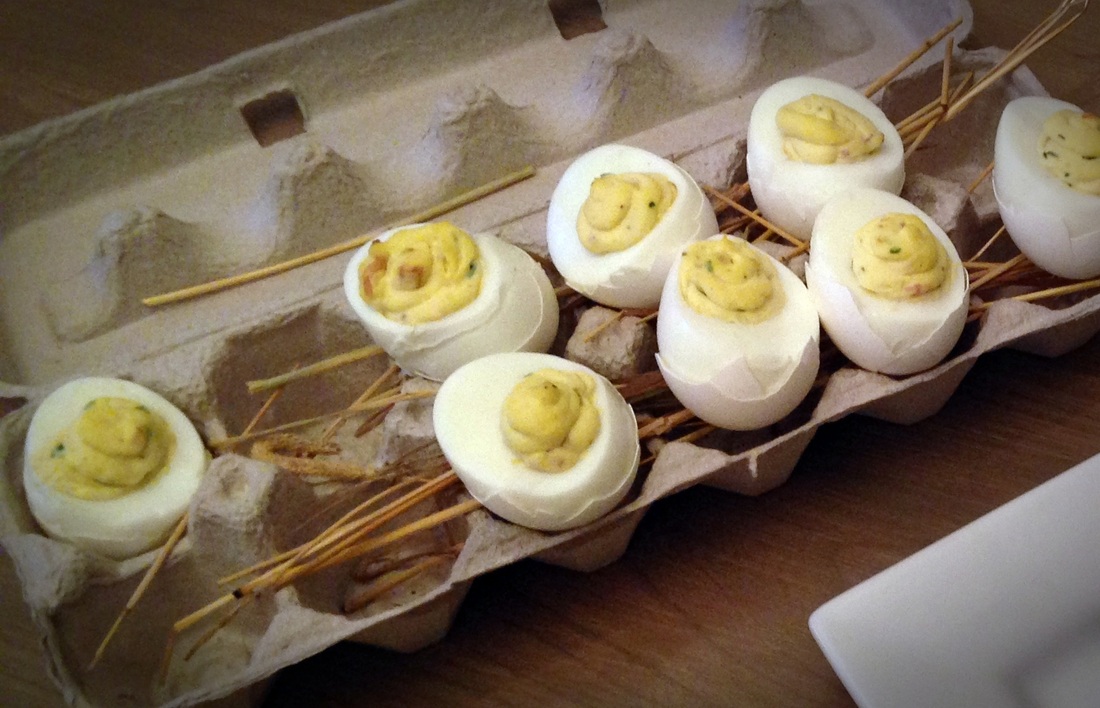
  • Bacony devilled eggs cut horizontally instead of vertically, placed back in a half shell, and displayed in an egg carton
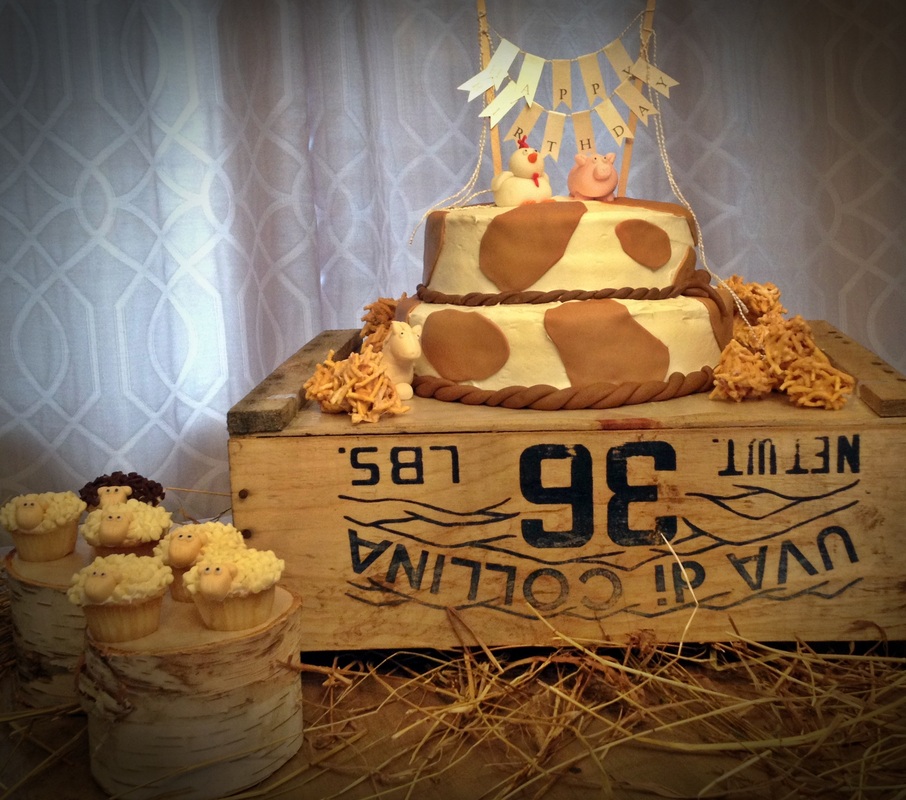
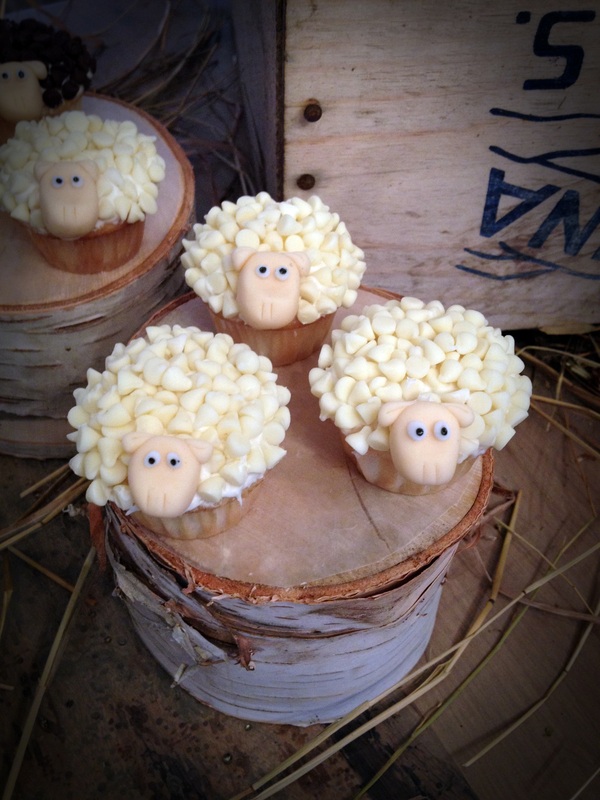
For dessert, french vanilla cupcakes were dressed as sheep with the help of mini white chocolate chips and fondant faces.
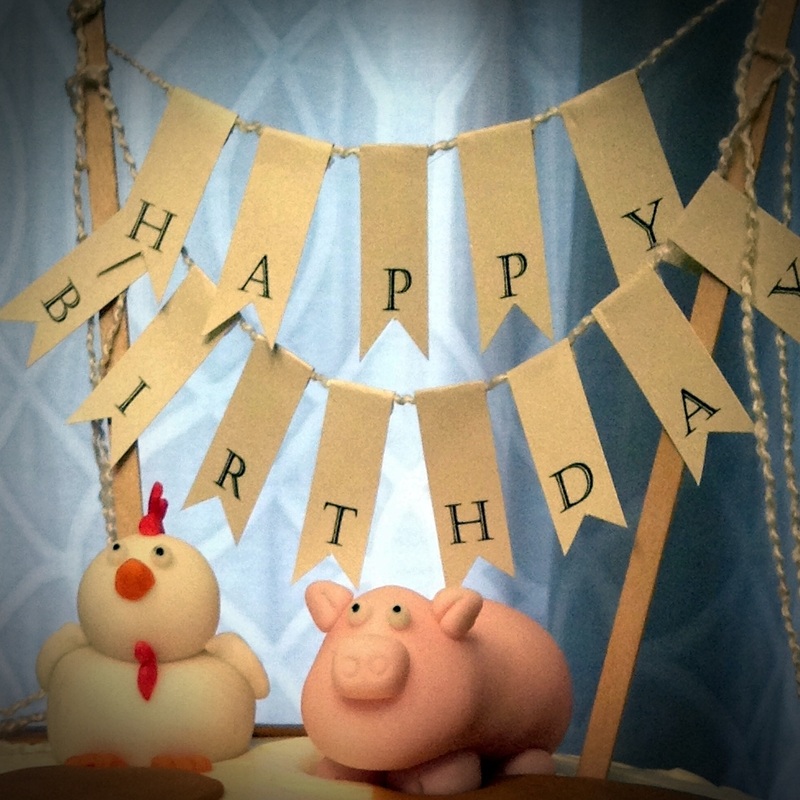
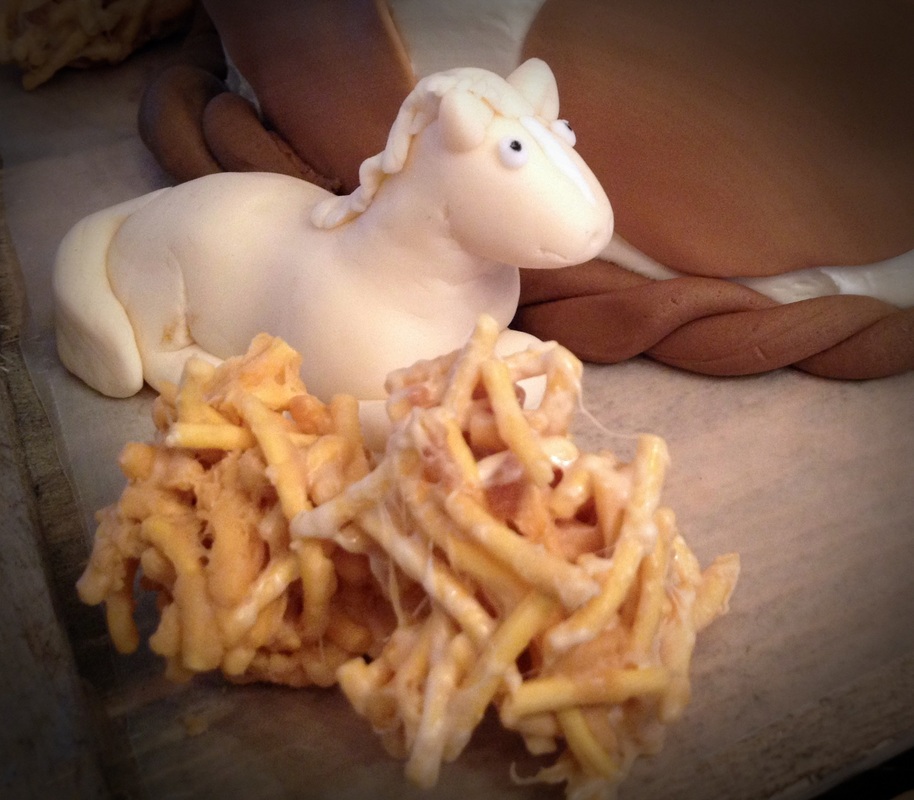
The two-tiered lemon and french vanilla birthday cake featured fully edible fondant farm animals, and was surrounded by peanut-free haystacks (made with marshmallows instead of the traditional peanut butter).
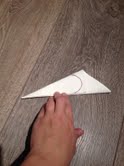
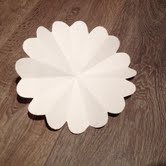
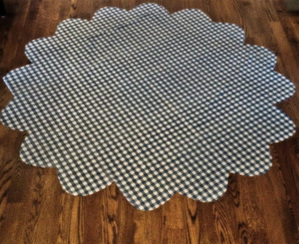
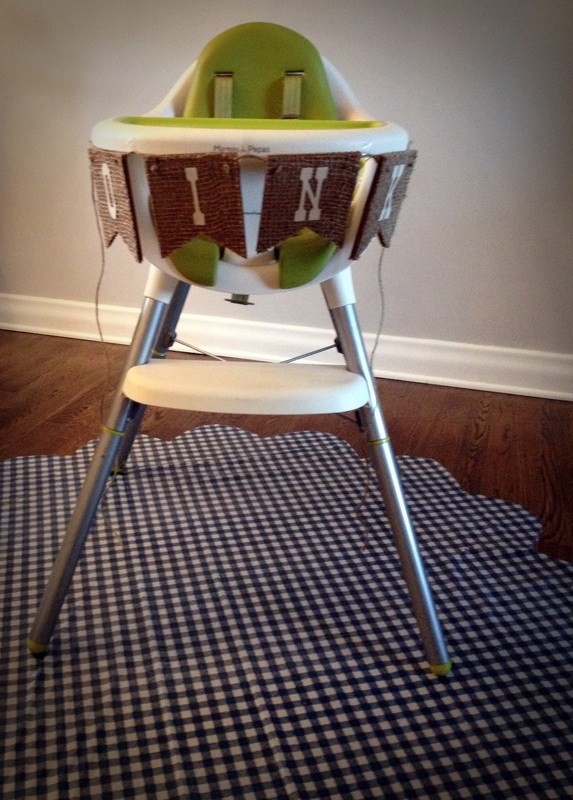
The cake smash was, of course, done atop the scalloped splash mat we featured here.
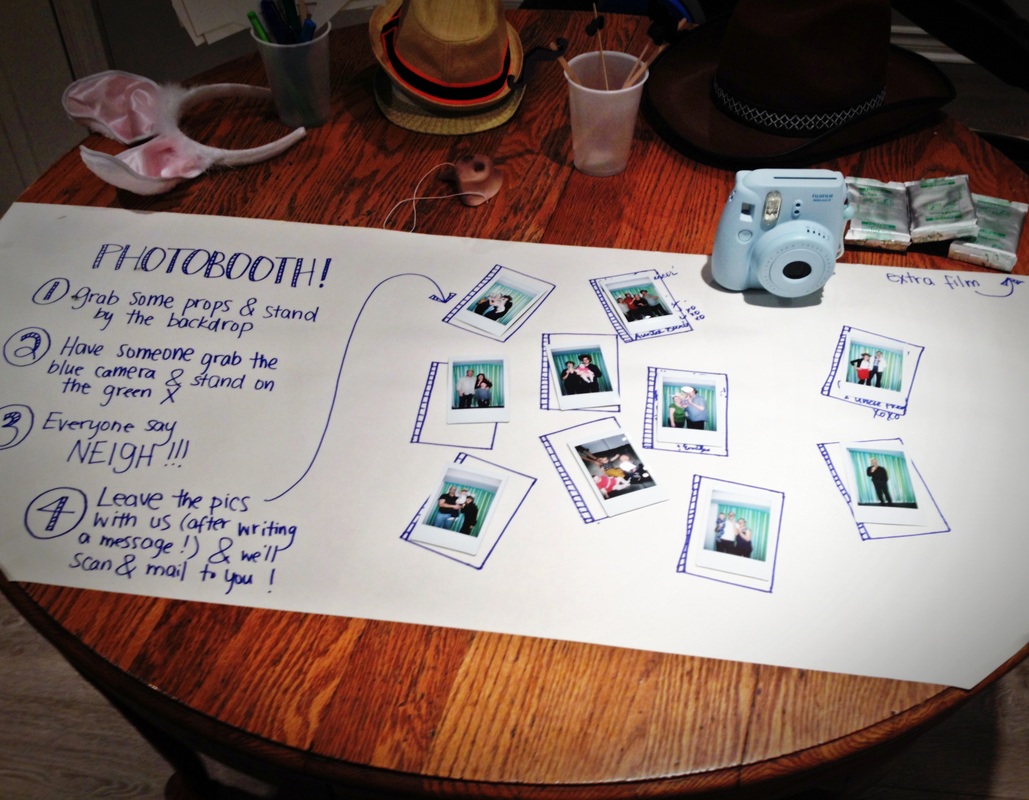
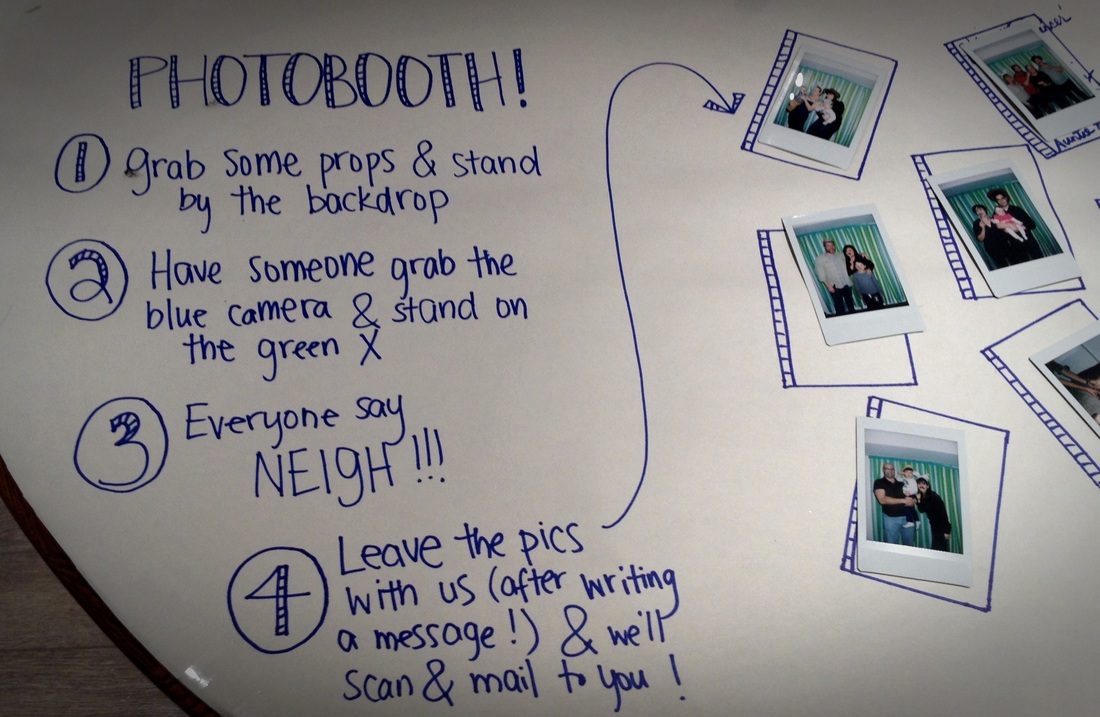
The photobooth was decked out with farm-related props, including a cowboy hat and mini straw hats, bunny ears, a pig nose, mustaches (not so on-theme, but very necessary!) and fill-in-the-blank speech bubbles.
All in all, we think it was a night to remember! What do you think?

Love,
Ashley, Jen and Alessandra
 
Picture


Full details of the vintage farm party we threw this past weekend are coming shortly - but, in the meantime, we've made a free printable of the adorable tags worn by the farm puppy favours!

Each puppy wore one of three thank you tags, complete with a vintage cow, rooster, or pig, and a joke. 

Instructions:
  1. Download and print the PDF file at the bottom of this post onto cardstock. 
  2. Punch out each tag with a 2" circle punch.
  3. Thread a large needle with baker's twine or yarn and 'sew' through the space at the top of the tag to create a hanging thank you tag. We found it easiest to put the tag on of a piece of cardboard and poke the needle through, removing the cardboard before pushing the needle all the way through the tag.
Enjoy!

Love,
Ashley, Jen and Alessandra
vintage_farm_thank_you_tags.pdf
File Size: 228 kb
File Type: pdf
Download File

 
A cake smash is a must at any first birthday party! And, as anybody who has children knows, one-year-olds are the messiest eaters around. If you don't want to be scraping icing from between your floor boards for the next year, a splash mat is therefore also a must!
We came up with this cute, easy, and very inexpensive splash mat for our vintage farm-themed party this past weekend (full party details to follow!). 

Here are the only two things you'll need:

  • plastic table cloth: we found this blue gingham beauty at the dollar store!
  • scissors: for cutting the table cloth

Here are the easy-peasy instructions:

1. Cut your table cloth into a square (if it isn't already square) with sides that are slightly larger than the diameter of the circle you want to end up with.

2. You'll need to fold the square table cloth several times. For convenient photo-taking, we show the folds you'll need to make on a sheet of 12x12 paper. 

First, fold your table cloth in half twice, as shown below. It should be a square that is 1/4 of the original size after these folds.


Picture


3. Fold the table cloth again, this time on the diagonal, to make a triangle.

Picture


4. Fold the right-angled tip of the triangle (in the picture above, this is tip on the right-hand side) down to meet the long side of the triangle.

5. Cut a semi-circle as shown below. When you unfold the table cloth, you should have 16 ridges.
Easy, right? Here's the final product:
Love,
Ashley, Jen and Alessandra
 
Picture

For those of you who are joining us for the first time after seeing us at the Rockcliffe Park Book Fair this weekend...welcome!

If you're looking for recipes for the goodies that we donated to the Cafe at the Book Fair, scroll down to yesterday's post!

This morning, Ashley was lucky enough to have the chance to visit the Book Fair, where she met several of the amazing volunteers that have clearly put in hundreds and hundreds of hours to create an amazing event.  

People come from all over Ontario (and probably beyond!) to attend this book fair, and with good reason. It was well-organized, with the team of volunteers being led by the talented Book Fair Chair, Seanna Kreager of www.wedloop.com

We hope you enjoyed the Book Fair as much as we did, and that you're enjoying our goodies! 

Love,
Ashley, Jen and Alessandra