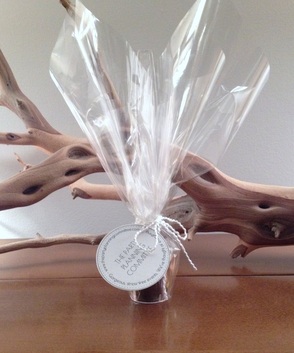
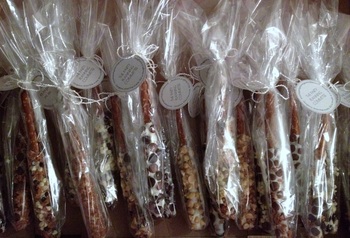
For those of you visiting the Rockcliffe Park Public School Book Fair this weekend, be sure to stop by our display and pick up some of our delicious, homemade goodies to enjoy with your book purchases!

We've prepared some delectable chocolate confections, including: hot chocolate spoons - perfect for warming you up on these chilly fall days, oreo pops - for the kid in all of us, and gourmet chocolate-dipped pretzels!
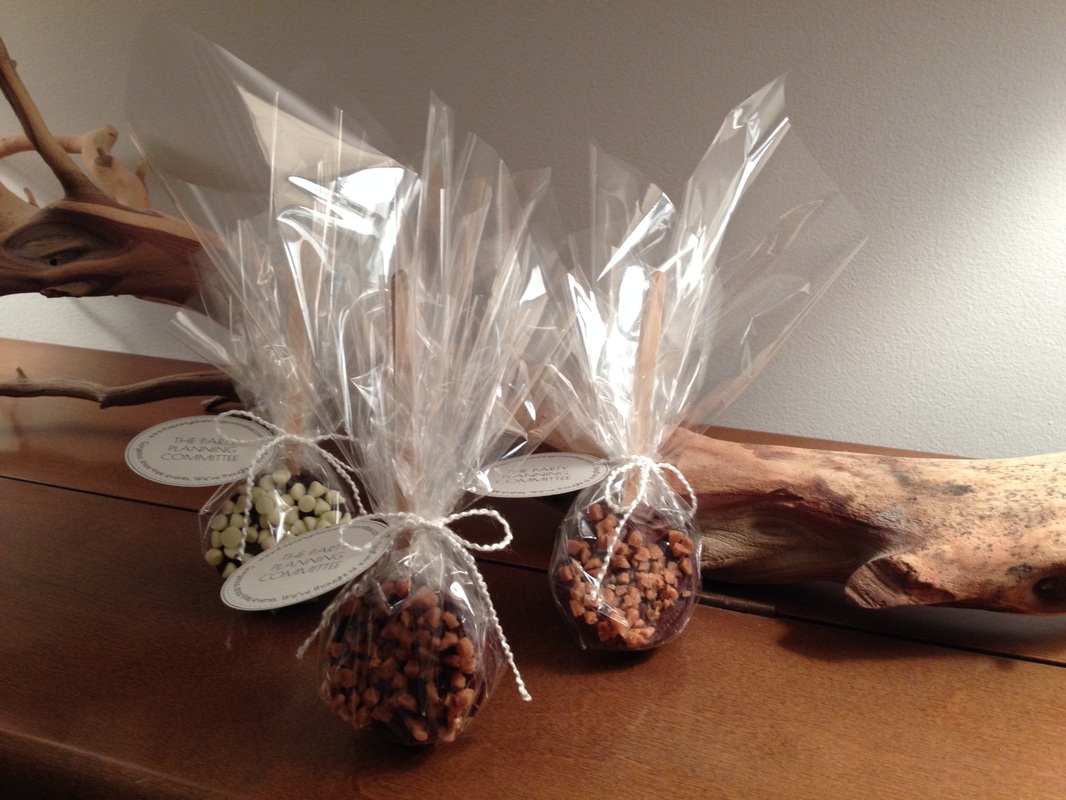
Even if you don't have a chance to snatch some up at the fair, here are the recipes so you can make them for your next event and dazzle your guests!

                                                                   
Picture
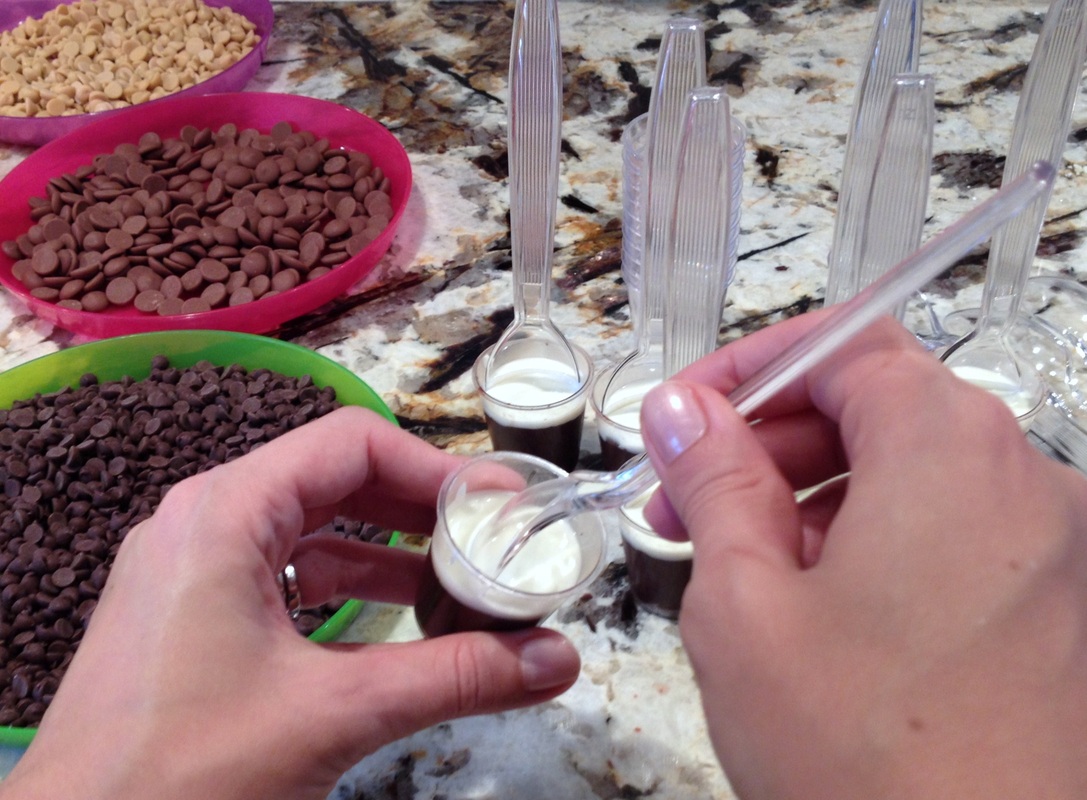
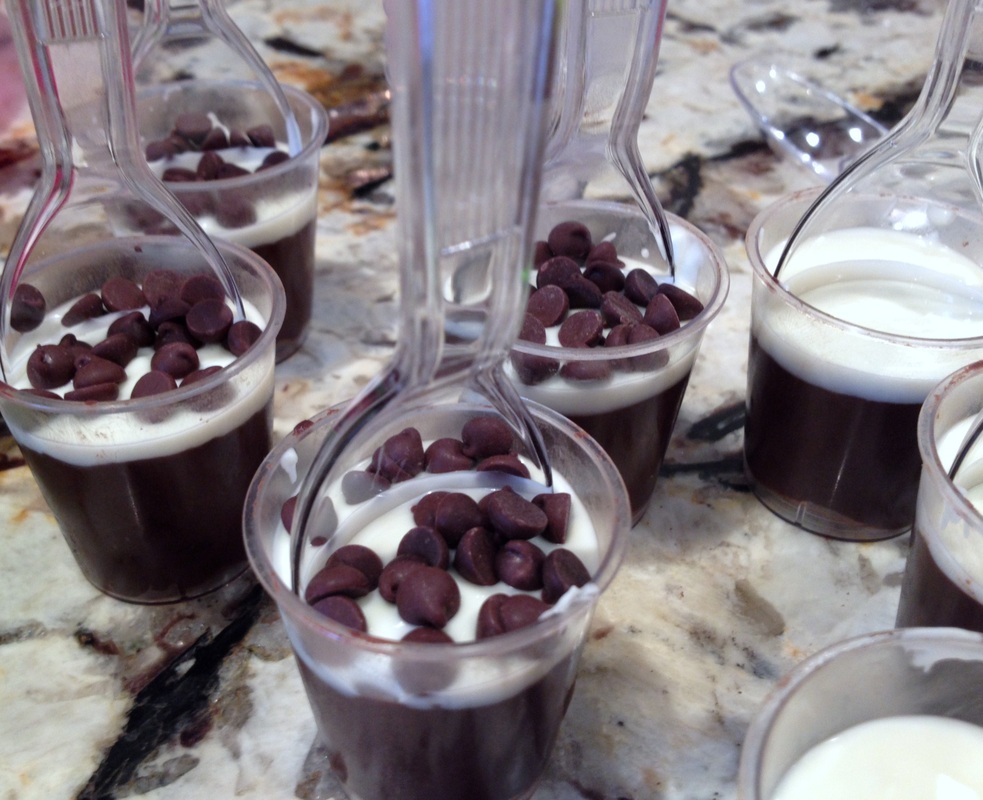
Hot Chocolate Spoons


Ingredients (for 10 spoons):
 
  • 200 g milk (or dark) chocolate
  • 2 drops of mint extract (optional)
  • 50 g white chocolate
  • 2 1/2 tbsp cacao powder
  • 5 tbsp icing sugar
  • Mini chocolate chips, or other edible decorations of your choice
  • 10 small plastic (or wooden) spoons
  • 10 small plastic shot glasses


Preparation:
  1. Melt the 200g of chocolate in a medium-sized bowl in the microwave on medium temperature for 1 min. Remove bowl from microwave and stir chocolate; place back in microwave and repeat process until the chocolate has a smooth, fluid consistency. *Note: do not use a high temperature as the chocolate will burn and become unusable. Stir in the mint extract, if desired.
  2. Stir the cacao powder and icing sugar into the chocolate. This will result in a mixture with a play-doh-like texture.
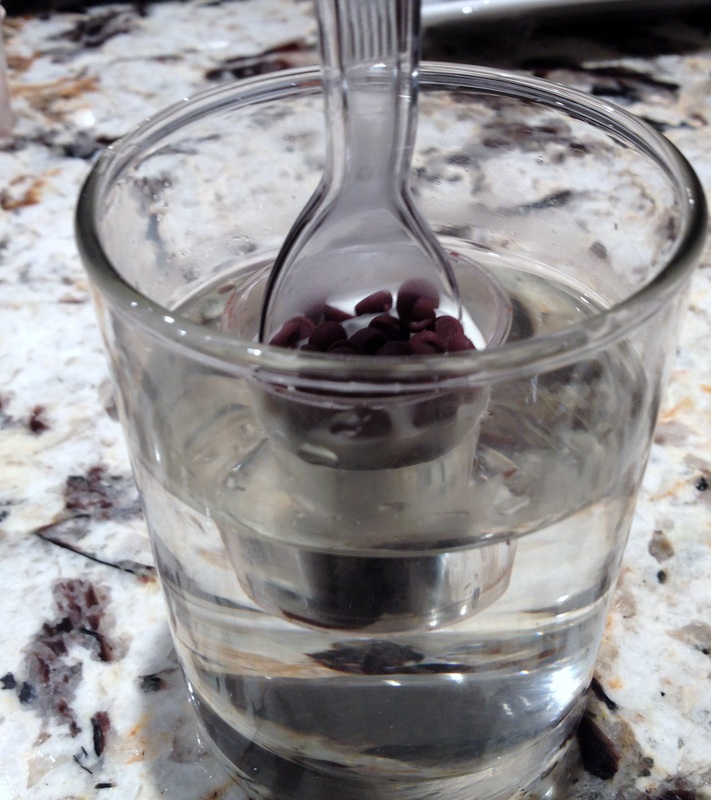
  3. Fill spoons 2/3 of the way with the chocolate mixture. Be sure to press it down into the bottom and sides of the glass to remove any air bubbles.
  4. Melt the white chocolate in the microwave on high for 1 min. *Note: white chocolate does not burn easily, so you can use a high temp here.
  5. Pour a thin layer of white chocolate into each of the shot glasses.
  6. Put the spoons into the glasses by slowly pressing the head down into the chocolate.
  7. Decorate the tops of the white chocolate with mini chocolate chips.
  8. Place assembled spoons in freezer for 5 min. Remove from freezer and dip into glass of warm water for approximately 30 sec, then gently pull spoon to remove it, and the attached chocolate, from the shot glass. Store in airtight container at room temperature until ready to use.

To prepare the hot chocolate, heat 1 cup of milk for each chocolate spoon. Melt chocolate in milk, stirring continuously. Enjoy!
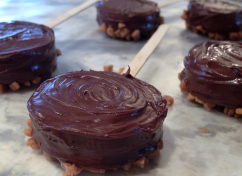
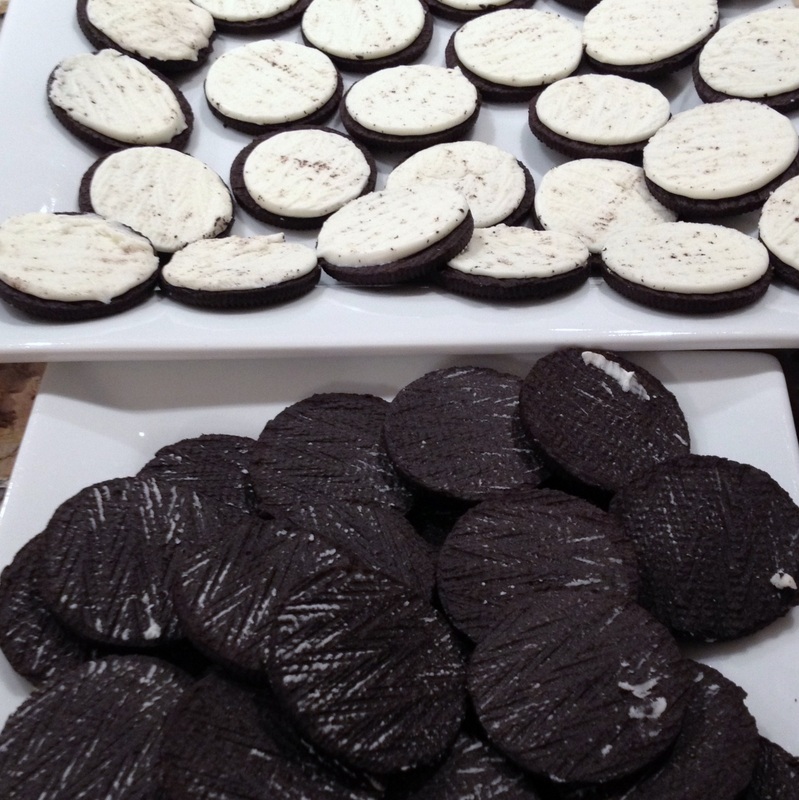
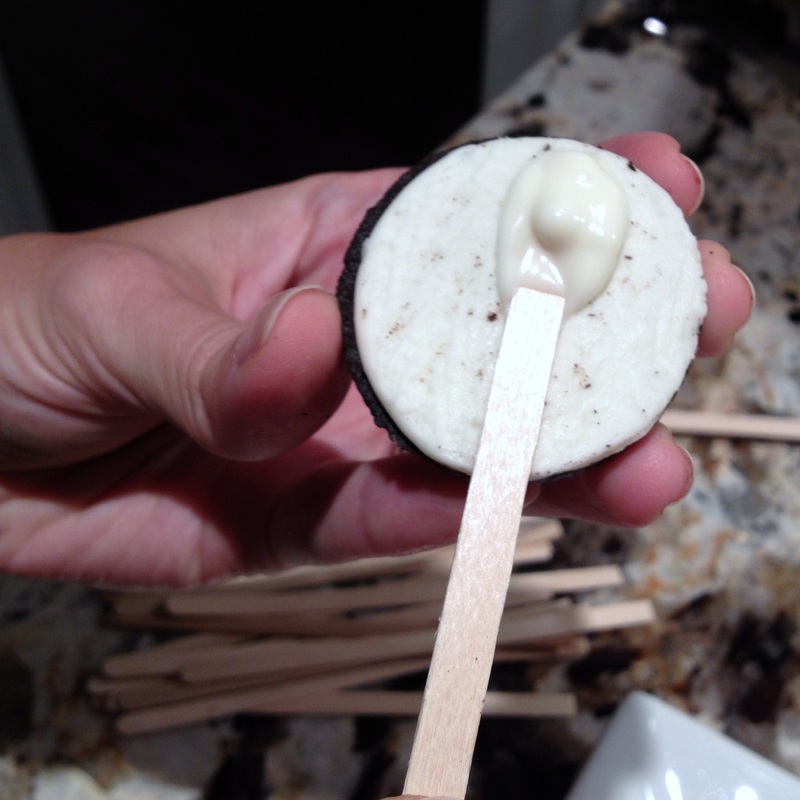
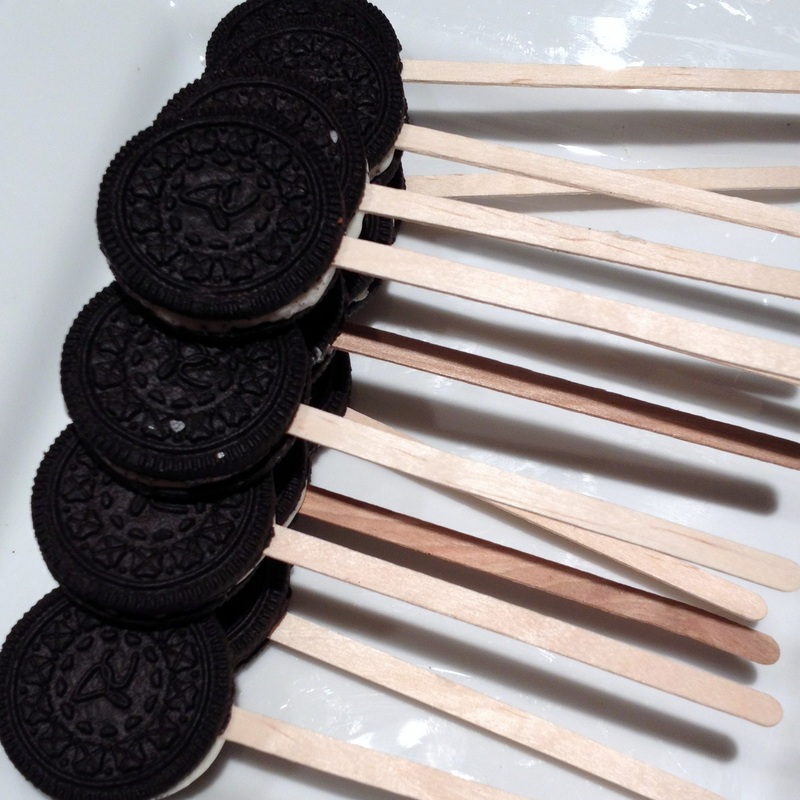


Picture
Oreo Pops

Ingredients (for 30 Oreos):
  • 200 g milk (or white) chocolate *Note that we used milk chocolate but these would be much easier to make with white chocolate due to its consistency
  • 20 g white chocolate
  • 1 box of Oreos (approximately 30 cookies)
  • Mini chocolate chips, Skor bits, or any other topping you desire
  • Wooden coffee stir sticks
Preparation:
  1. Melt the 20 g of white chocolate in the microwave on high for 1 min.
  2. Remove one side of the Oreo cookie. Dip one end of a stir stick in the chocolate and place in the filling of the cookie. Put the removed side of the cookie on top. Let the Oreo cookie pops sit for several minutes to allow the chocolate to set and create a bond.
  3. Melt the 200g of milk chocolate in a medium-sized bowl in the microwave on medium temperature for 1 min. Remove bowl from microwave and stir chocolate; place back in microwave and repeat process until the chocolate has a smooth, fluid consistency. *Note: do not use a high temperature as the chocolate will burn and become unusable. **If using white chocolate follow instructions from step 1.
  4. Dip the Oreo cookie pop into the melted chocolate. Cover both sides then tap off the excess chocolate. You may need a knife or spatula to spread the chocolate evenly over all edges of the cookie.
  5. Place one side of the Oreo pop in the mini chocolate chips, or Skor bits, or other toppings.
  6. Place the Oreo pop on wax paper, undecorated side up and allow to dry for 20-30 minutes.

Picture


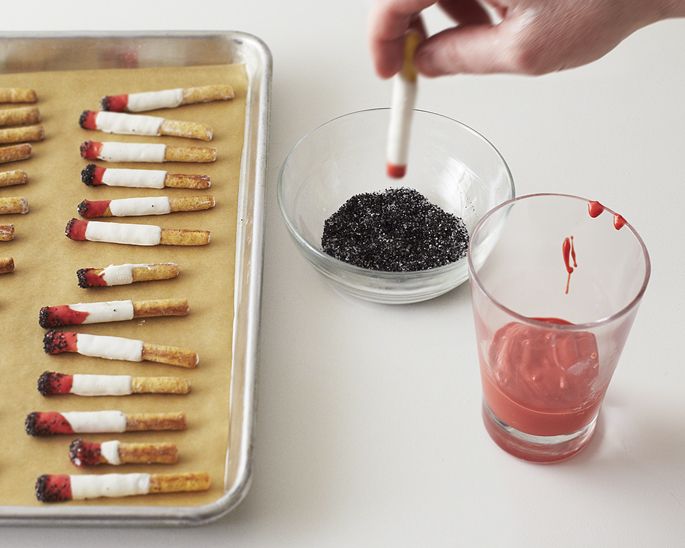
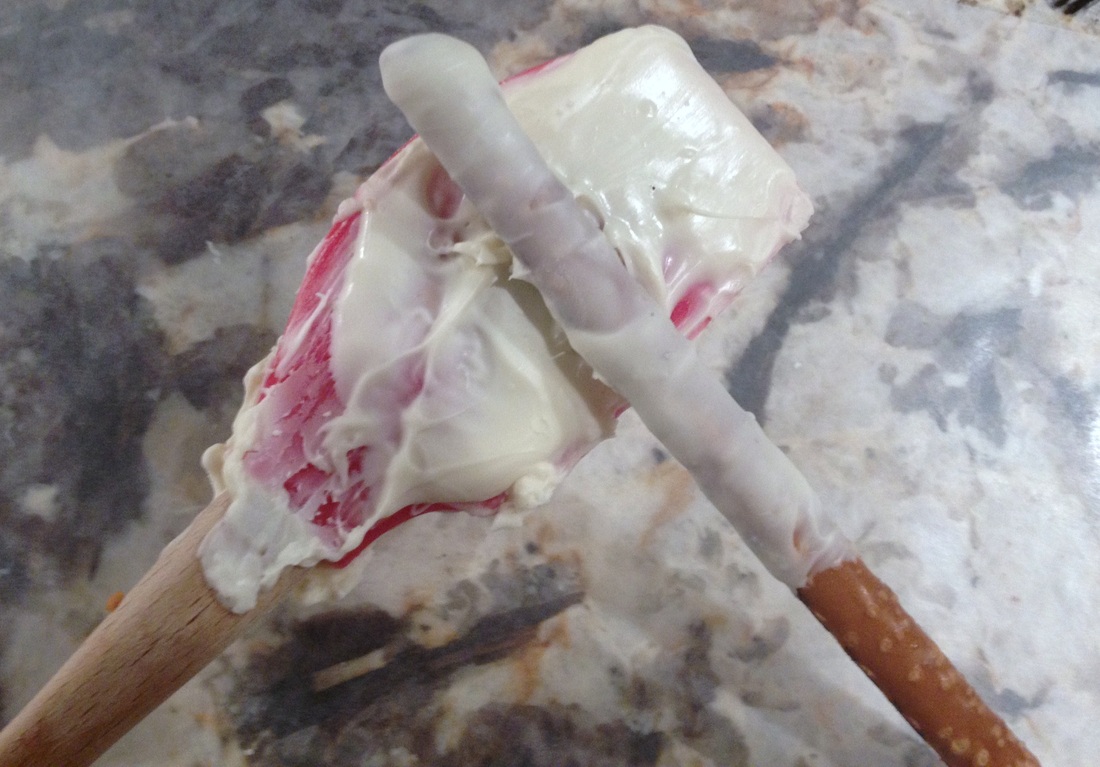
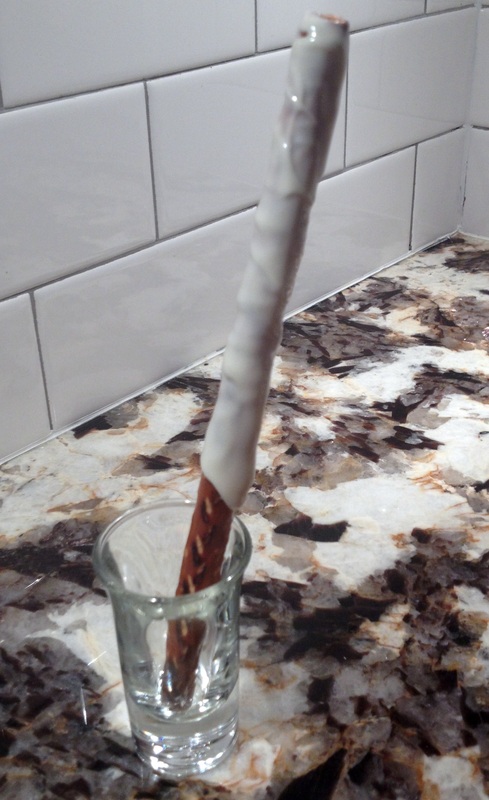
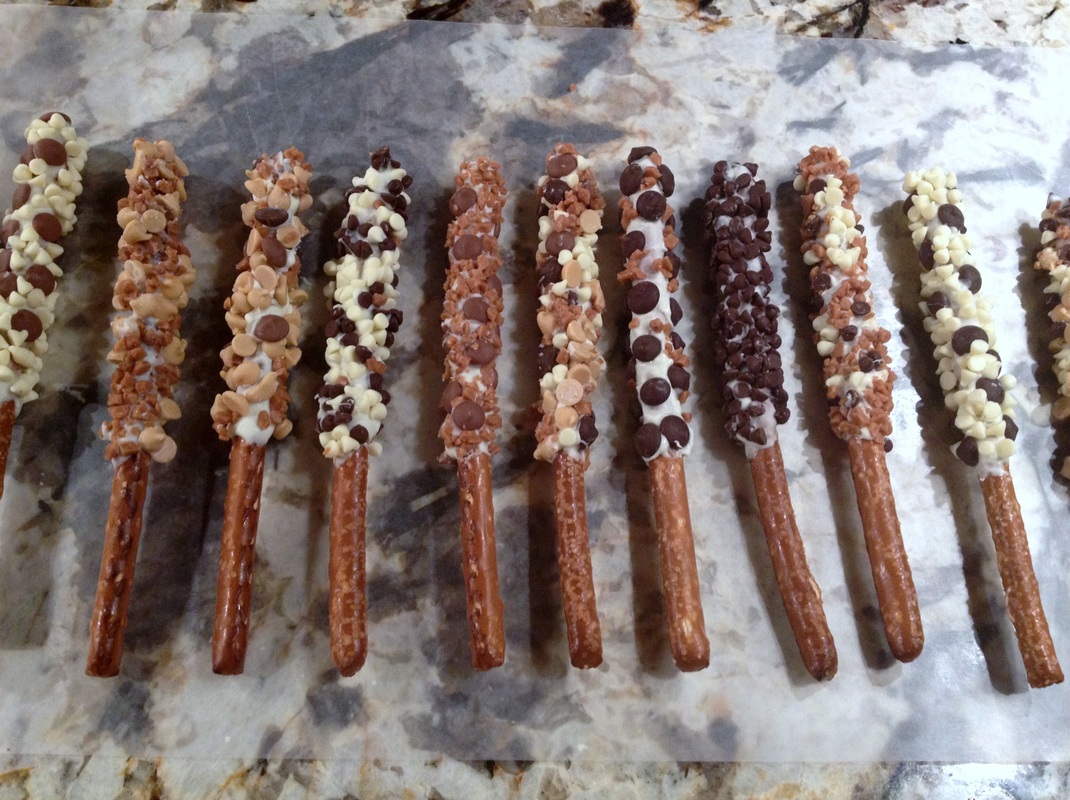
Chocolate -Dipped Pretzels


Ingredients (for approximately 30 pretzel sticks):
  • 280 g pretzel sticks
  • 340 g white chocolate
  • Mini chocolate and butterscotch chips, Skor bits, or any other desired topping


Preparation:
  1. Melt the white chocolate in the microwave on high for 1 min.
  2. Dip 2/3 of a pretzel stick in chocolate. You may need a knife or spatula to spread evenly.
  3. Allow the chocolate to set a little (but not dry completely) by balancing it in a small glass.
  4. Sprinkle the toppings onto the stick. You may need to press the toppings down gently so that they stay in place. Or, place your toppings on wax paper and roll each pretzel stick in the topping.
  5. Lay the pretzel sticks on the wax paper to dry completely.

We hope you enjoy these delicious, chocolately treats that are great for all ages!
Have any fun variations of these treats that you'd like to share?


Love,
Ashley, Jen and Alessandra


Picture
One of our favourite things to do here at The Party Planning Committee is to come up with themes for parties we'd love to throw - and inspiration strikes at the most random of times! Ashley's son was playing with an old typewriter at his great grandparents' house, and we thought...a Mad Men-inspired party would be quite the shindig! 

For those of you who aren't familiar with the series, Mad Men is an award-winning show set in the 1960s, and focuses on the lives of advertising executives, and their wives (and mistresses!). 

As always, we love to build parties from the ground up, from attire to decor to food, and beyond. 

Picture
Stationery


We love these print-at-home vintage typography invitations from LetterandthePress on Etsy

Or, if you're feeling especially handy with the computer, you could whip up something similar in Word!

These classy invitations set the mood for the party, and ensure that guests will know that they should show up dressed to the nines!


Attire

First off - the hostess' dress. We know and love that Banana Republic has a collection based on the series, but, we love a challenge - and these vintage dress patterns fit the bill! How much fun would it be to pick up one of these patterns and sew your own costume? So much fun! 

Would you choose "the Joan"......................................................or "the Betty"?
Picture


For the men, suits are a given and skinny ties (or bow ties) are a must! Check out this fun tutorial for DIYing a skinny tie over at A Beautiful Mess!

We also love pocket squares and retro glasses and fedoras and shirts with lipsticked collars...and...and...


Decor

Next up (and probably our favourite part of any party) is the decor! There are endless creative decor possibilities with this theme!
Picture

Because the typewriter sparked the idea for this party, we would put one at the door for guests to leave a message for the hosts, surrounded by flowers in clear glass jars. 

We would also pick up an old desk or vintage sewing table (Kijiji is our go-to website for scoring thrifty finds) and paint it a fun colour, sanding it at the edges for that chippy look!


Next, we would print 60s ads onto cardstock and post around the main party areas:


And finally, because no theme party is complete without a photo booth, we would use a simple backdrop and fill the prop bucket with fake cigarettes, martini glasses, winged eyeglasses, skinny ties, baking sheets, and aprons!
Food & Drink

We love the idea of making chocolate-dipped pretzel cigarettes and tie cookies!
We would also serve as much food as possible in martini glasses, and of course, every 1960s party requires a cheese ball! This bacon spinach cheese ball is a modern take on an old classic.
As for drinks, gin martinis with tons of olives would be essential, as would scotch and other gorgeous drinks in decanters.
What are your ideas for our Mad Men party?

Love,
Ashley, Jen and Alessandra
All images via Pinterest. Visit us on Pinterest for full image details.
 
Fall is here (though it's feeling more like winter!) and you may have taken a trip to the local orchard or farmers' market and are wondering what to do with all of those inspiring ingredients. Here is a quick and delicious recipe for individual-sized apple crumble dessert to serve at your next gathering!
Picture
For this recipe you will need: 
  • 8 medium apples, firm like Royal Gala, Macintosh
  • 1 cup brown sugar
  • 3/4 cup butter (or margarine)
  • 2 tsp cinnamon, divided
  • 3/4 cup rolled oats
  • 1 cup flour

Picture

For the apples:
  1. Peel the apples and cut into thin slices, avoiding the core.
  2. Sprinkle the apple slices with 1 tsp of the cinnamon and divide evenly into 8 ramekin dishes.

Picture

For the topping:
  1. Using a mixer, cream butter and sugar together at medium-low speed.
  2. Mix in flour, oats and remaining 1 tsp of cinnamon, at low speed. Mixture should end up being crumbly, so be sure to not over-mix!

Picture
Now to put everything together:
  1. Divide the topping evenly over the apples in the individual dishes.
  2. Bake @ 350 F (for conventional oven)for approximately 45 minutes or until the top is golden brown and the contents bubbling.
  3. Remove from oven and let sit for 5 minutes.
  4. Serve with a scoop of vanilla ice cream and enjoy!

You can bake these up to one day in advance to minimize work and maximize the fun on the day of your party! 

For bite-sized versions, disposable tart cups could be used instead of ramekins. This recipe could also be made using peaches, pears, berries or any other of your favourite fruits. If you have a fun variation that you'd like to share, please do!

Love,
Ashley, Jen and Alessandra
 
For next weekend's vintage farm-themed 1st birthday party we've designed a simple and sweet rustic bunting to wish the guest of honour a 'Happy Birthday'!
With its chevron-style flags and neutral colours, this banner fits perfectly with the intended vintage feel. This design could also be easily adapted to any celebration with different coloured materials, lettering and flag shapes!

To create this decorative sign you will need:
  • cardboard: quantity depends on size & number of flags. For the fourteen 12 x 15 cm flags used here we required 2520cm-squared of cardboard. Tip: use a cardboard box - they are easy to cut and the flaps/sides are already in convenient-to-use strips!
  • burlap; again, quantity is flag-dependent
  • ruler: to use as a cutting edge for the flags
  • utility knife and cutting pad: for cutting out the flags
  • twine: to string the flags together
  • scissors: for cutting the burlap and twine
  • letters: cut out of cardstock or stenciled on with paint. We used outdoor burlap (much cheaper!) and the large weave was not easy to paint on so we chose cardstock letters cut with a Cricut.
  • glue: to hold everything together!
Now on to the easy assembly:
Picture
1. Create a template for the flags by cutting out a rectangle of the desired size from the cardboard. To make the chevron cut-out, cut on an angle from the center of the rectangle, at the desired height, to the corner. Repeat for the other side of the chevron.

2. Put this flag on top of the remaining cardboard to use as a cutting edge for the other flags. Cut out the number of desired flags.

Picture
3. Use the flag template to cut out burlap pieces to cover the flags.

4. Glue the burlap to the cardboard flags.

5. Glue the letters to each flag and place under a heavy book, or other object, for 1 min to ensure that the burlap and letters are flat.

Picture
6. Cut small slits in the two upper corners of each flag.

7. Cut twine to the desired length and string between the holes in adjacent flags using a knot to secure them.

Voila! Now you have a fun sign to hang for your next celebration!
If you have other DIY projects that you would like us to post a how-to for let us know!

Love,
Ashley, Jen and Alessandra
 
Great parties are built around themes, and, themes are often built around colour.

This image is from a fun and colourful summer wedding that was planned and executed by The Party Planning Committee (see more pics of this gorgeous wedding here). The PPC hung strands of clear rock candy topped with simple silver ribbon on manzanita branches to frame the candy buffet.

While the colour scheme for the event as a whole was much brighter, this picture captures how the splashy scheme was balanced with neutral elements to bring the level of sophistication way up!

Photograph by Blair Gable.
 
In two weeks, we're throwing a vintage farm-themed first birthday party, and we've come up with a menu full of farm-fresh recipes including these caprese salad bites. 
Since our mothers told us never to serve untested recipes, we made these for our weekly Party Planning Committee dinner - and boy are they delish! We can see these little morsels being passed at a cocktail party, being served as an appetizer, or being scaled up to full side salad proportions for a dinner party.


We can think of tons of fun variations on this bite-sized salad:
  • BLT bites (swap the mozza and basil for bacon and lettuce)
  • Greek salad bites (top a cucumber coin with a tomato filled with feta and oregano)
  • Couscous or quinoa salad bites (fill the tomato with couscous or quinoa mixed with finely chopped onion and sweet onion dressing)


Picture
Here's what you'll need for the caprese salad version:
  • 1 pint grape or cherry tomatoes (we used grape tomatoes)
  • Approx. 100g mozzarella (about 1/4 of the ball pictured)
  • 4 leaves fresh basil
  • Balsamic vinegar reduction (if you can't find this at your grocery store, simply heat balsamic vinegar in a saucepan over medium heat until thick and gooey)

Here's what to do:
  1. Shave enough skin off of one side of each tomato so that it sits flat on a plate. Then, flip the tomato over and cut off enough that the seeds and inner flesh are exposed. 
  2. Scoop out most of the innards and set aside for another recipe.
  3. Tear off triangular pieces of basil and insert to one side of the hollowed tomatoes.
  4. Cut strips of mozzarella and arrange inside the tomatoes.    
  5. Drizzle with balsamic vinegar reduction, and voila! Scrumptious bite-sized salads!

Note: If you're making these in advance, refrigerate prior to drizzling with vinegar, and drizzle right before serving.
We hope you and your guests enjoy these! Let us know how they turn out and what variations you come up with!


Love,
Ashley, Jen and Alessandra